Building Custom Cornhole Boards

As a craftsman, I’m always looking for exciting new projects to explore new skills to challenge my creativity outside of my usual design projects or teaching. For a recent side project, I took inspiration from my humble beginnings as a contractor and built custom cornhole boards for my yard.
If you’re not familiar with cornhole, or bags as some call it, it is a lawn game in which players toss small bags filled with corn or beans onto a raised platform with a hole in the center. Cornhole has always been a favorite of my family; an essential part of all bbqs, parties, or any other excuse that Midwestern folks have to get together outdoors.
The Project
My wife and I recently moved into a home with a yard. With a patch of grass to call my own, I set out to research the best approach to build a board set. A quick search on YouTube provided endless walkthroughs and demos of yard warriors with a similar passion for tossing corn into a hole. After a few videos it was clear that there were endless approaches to building a set, and I could pull concepts and materials from several sources.

The Blue Print
Here is the list of materials I used to make my boards:
Two 24 in by 48 in birch plywood boards (between ½ in or ¾ in thick)
Four 2 x 4 x 8 ft studs
Small box of 2 ¾
wood screws
Four 6 in by ¾ in carriage bolts
Four ¾ wingnuts
Interior or Exterior latex paint
Brushes
Painters tape
The top priorities for my set were durability, a unique design, and easy storage. After a few attempts on the grid paper I drafted a design to be built from standard 2x4s and 24x48 birch plywood sheets. The legs would be attached with a bolt and wingnut so that they could be loosened and hung flat on my garage wall.
The Process
After a quick run to my local hardware store, I started to create the boards in my garage studio. The construction of the boards did not take long. A few cuts on the 2x4s with the circular saw and the jigsaw to round off the legs took only a few moments, but solving the problem of cutting a hole in the center of the plywood was slightly more challenging.

The Hole
I ended up using a ½ in drill bit to drill 4 holes on the interior perimeter of the 6 inch circle I had drawn, then used the jigsaw to cut along the lines. It wasn’t the cleanest cut and required some intense sanding to create a smooth rim. (Subsequent attempts on the center were more successful. Practice makes perfect.)
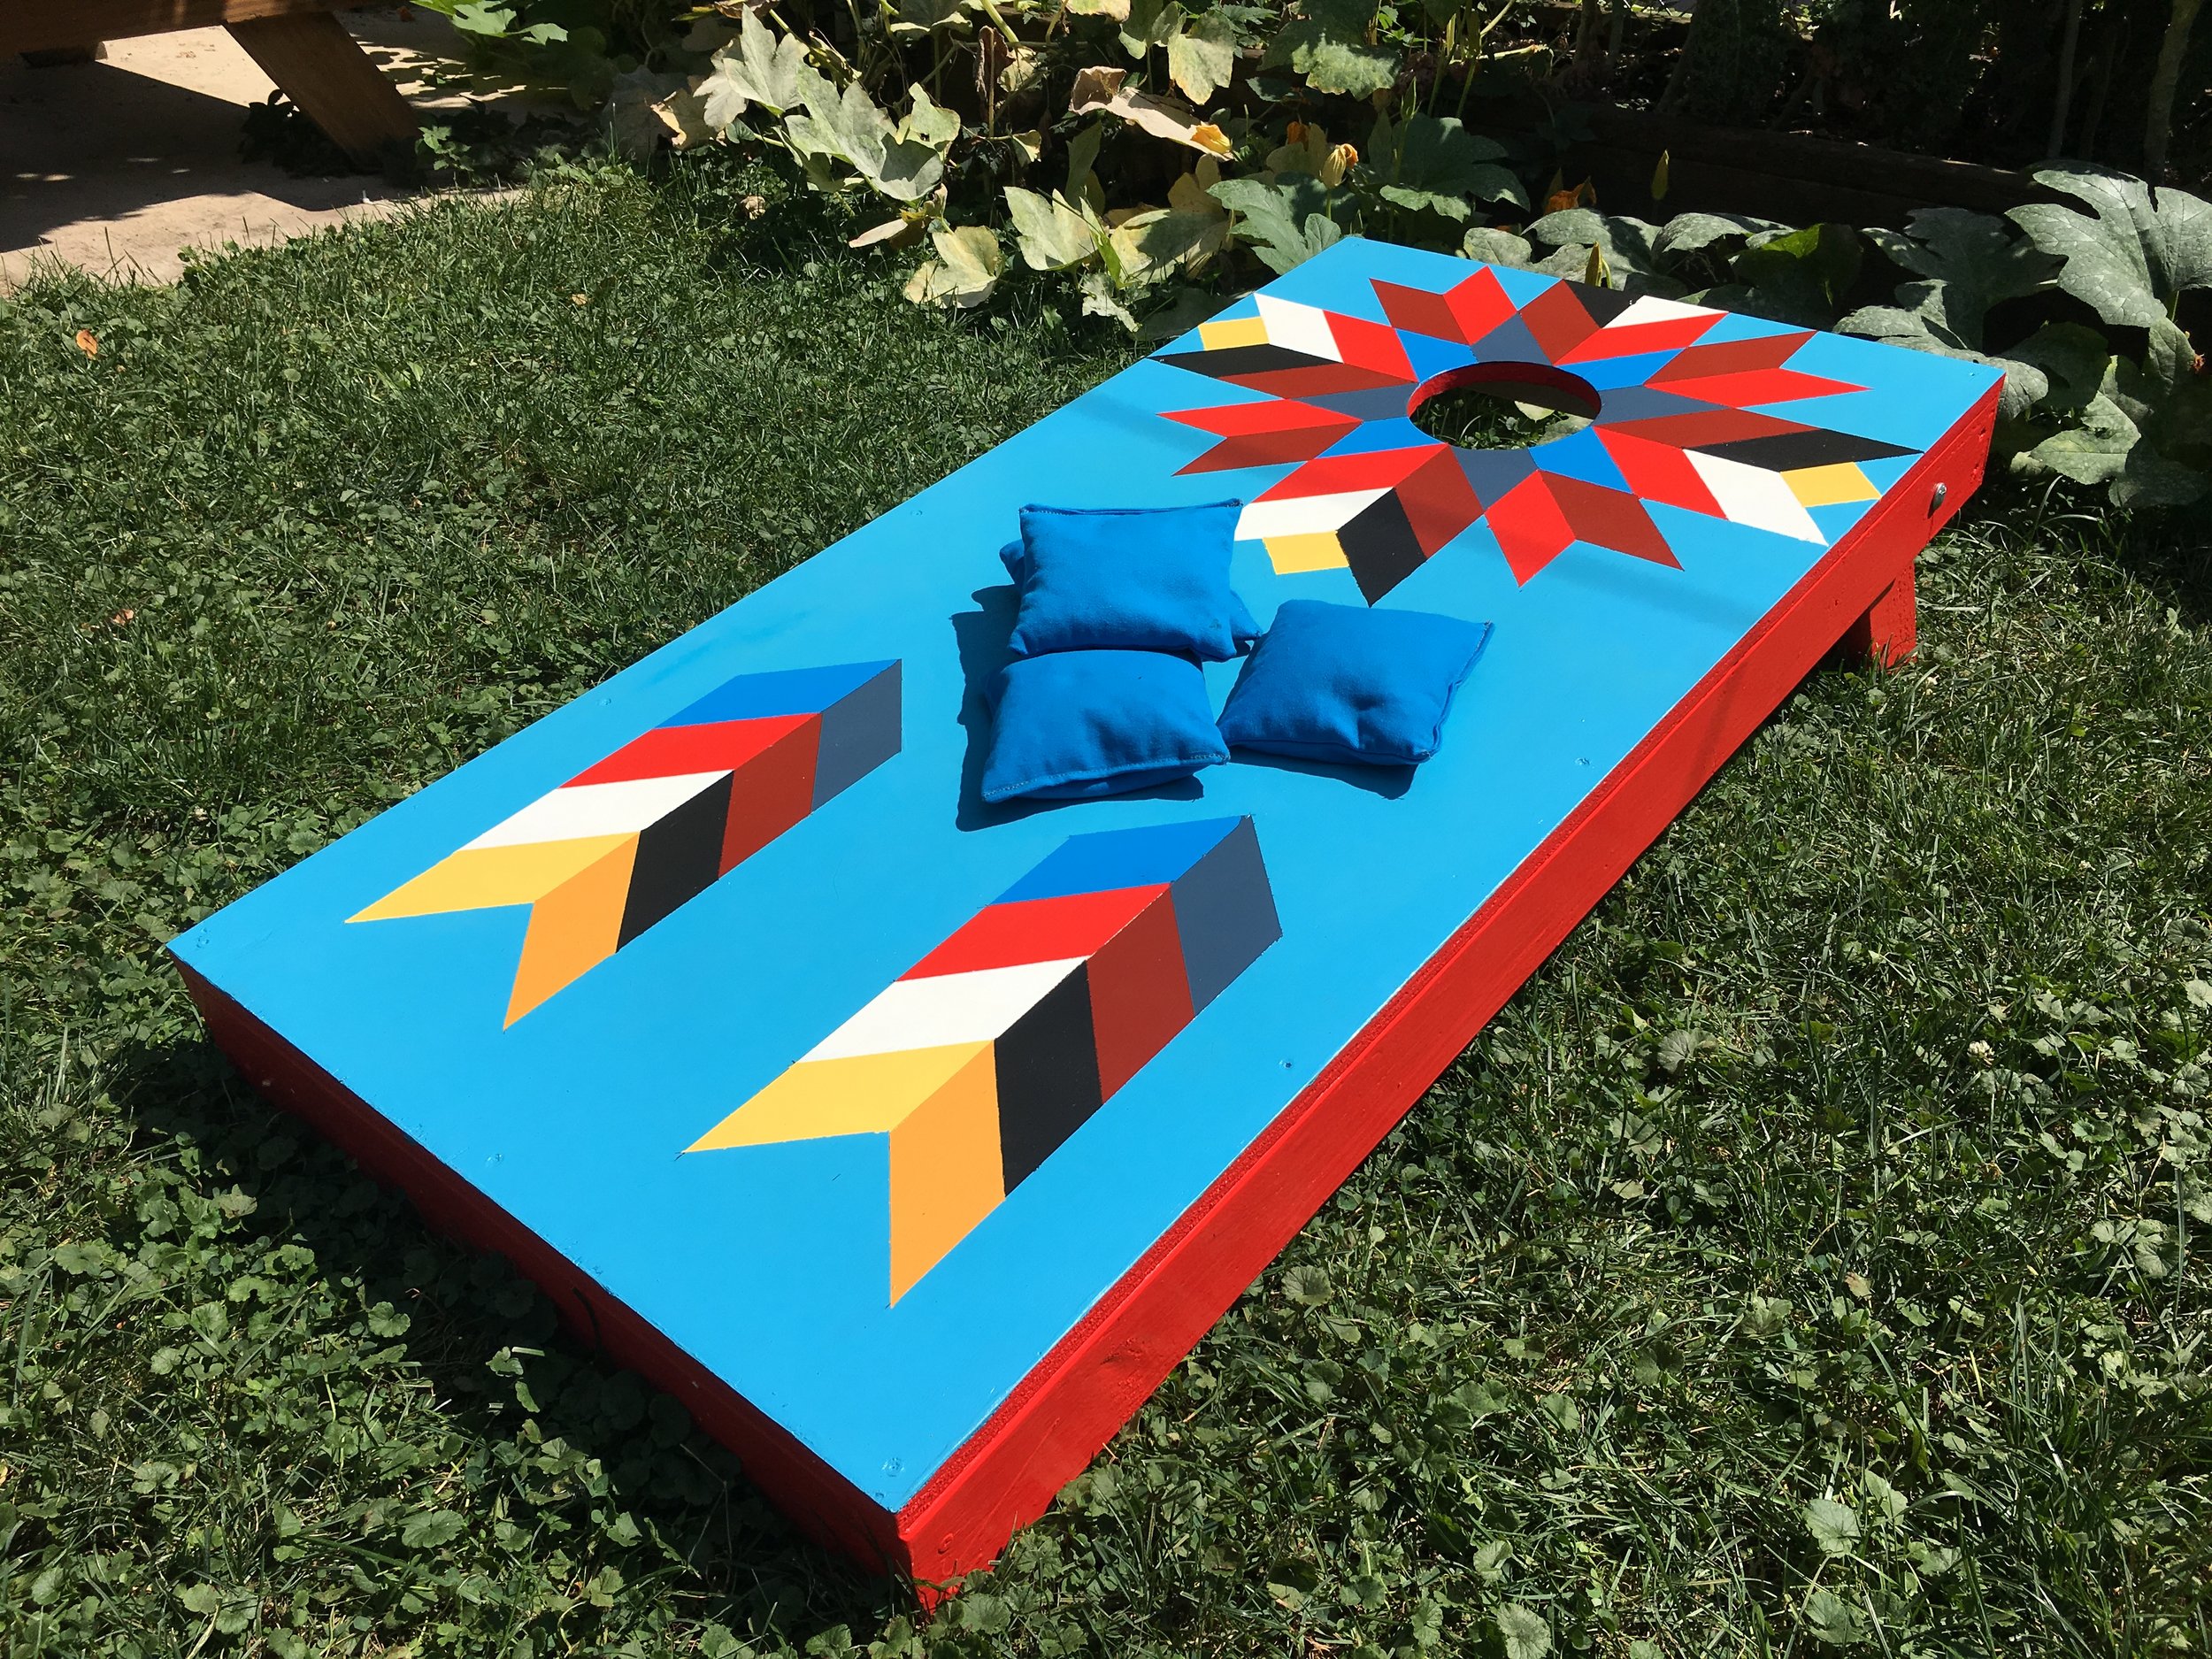
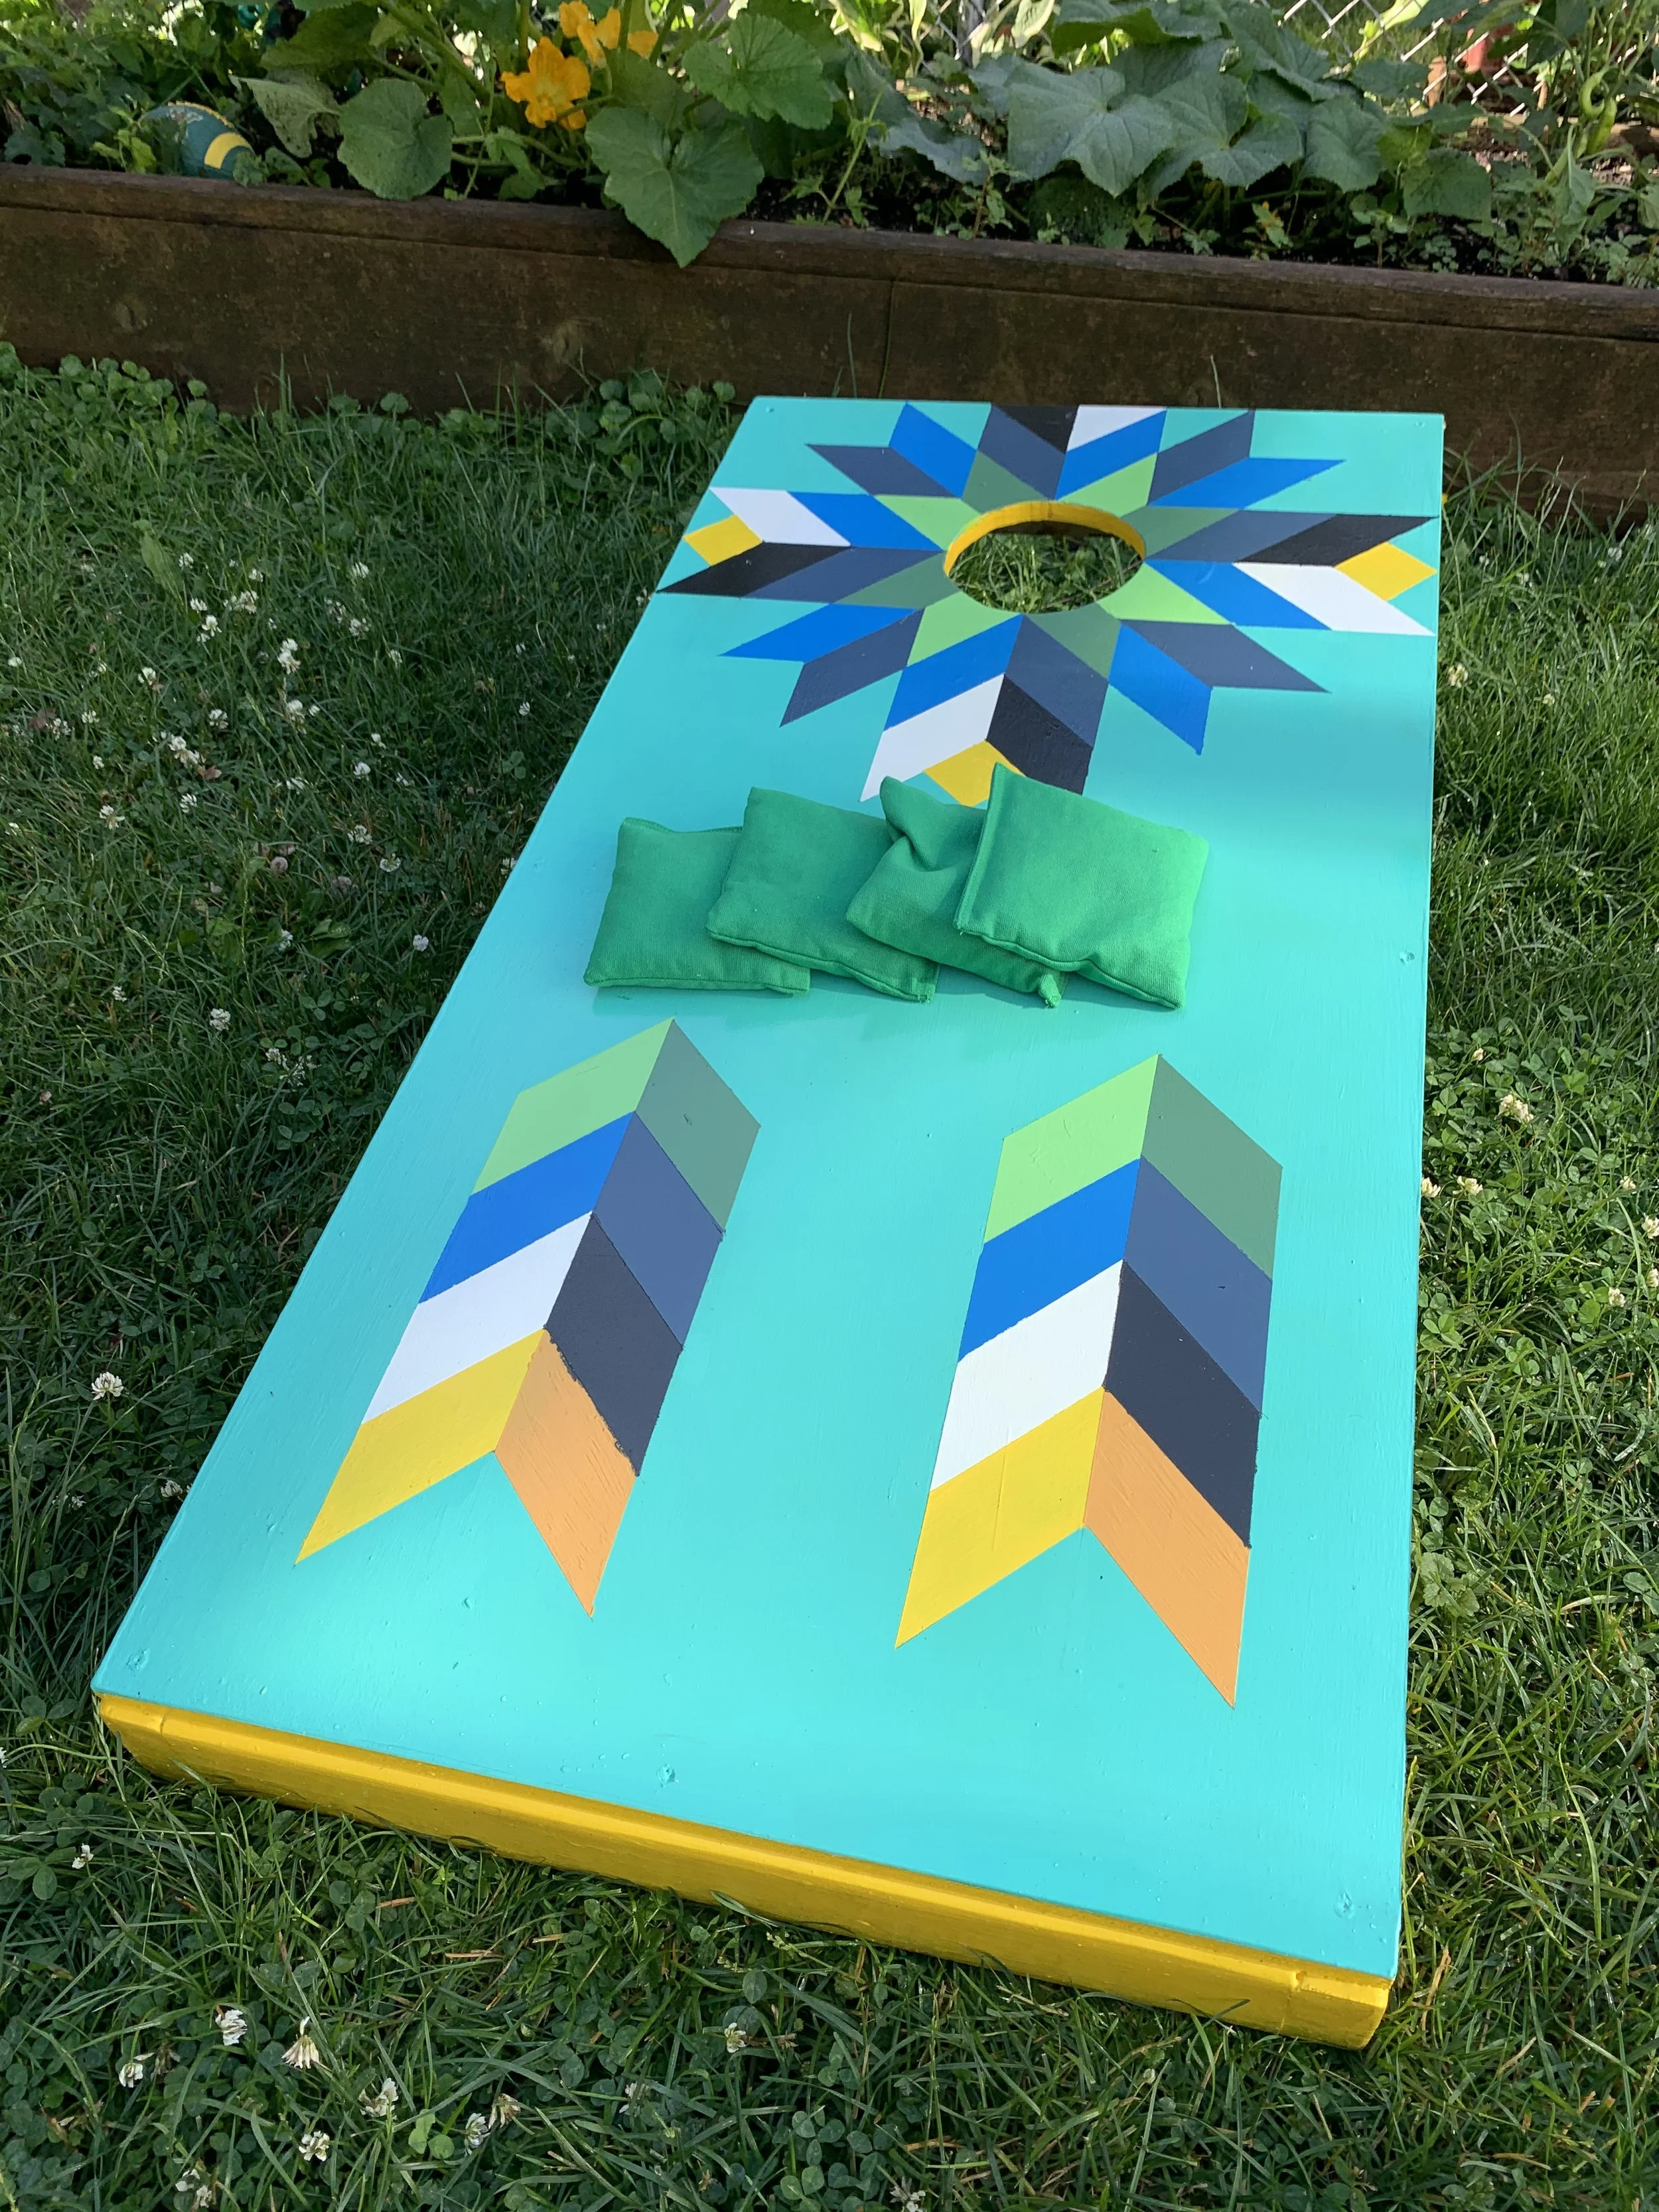
For the board face, I wanted to pull inspiration from Barn Quilts. I often drive through southern Wisconsin, which over the past 15 years has been speckled with colorful geometric designs hung proudly on family farms. I helped paint one with my family, which still hangs on my parents porch today.


The Design
The design ended up emphasizing the hole like a sunflower blossom, and I added some “action arrows” to make it feel sporty. I made variations of the idea in Illustrator. Originally, I had a stalk design and circular design to fill in the design, but I edited those out once I completed the set.
Luckily I had over 15 different buckets of paint left over from a recent mural and could really play with the color schemes. For my first set of boards, I just kept it simple: primary and secondary.
The Painting
After putting a few coats of primer on the boards, the side wall, interior rim of the center hole, and legs were painted an accent color.


I mixed some hues of paint to match the hues in the digital design mockup. The sides of the boards and center rim were taped using painters tape and the surface was painted.
Once dry, I used a ruler to draw a soft grid on the surface. Then, I mapped out the drawing so that I could easily tape off sections while I painted.


Watching paint dry…
The next part was truly the most time consuming portion of the project because I literally was watching paint dry. Tape off another section. Paint it. Tape off another section. Paint it. SO MUCH TAPE!
It was a great way to catch up on a few backlogged podcasts.
After a late night of painting, the boards were done and all I had was a bolt on the legs. I found a manufacturer called GoSports that made a wide assortment of bag colors, so I ordered colors to pair with either both boards in the set.


The Playability
The boards were tested out by friends and family at a bbq at my house a few days later. And they were a hit! The game was in use almost the entire day, and we even had to throw on the garden lights to close out the tournament that evening.


People were attracted to the geometric design and the bold colors, dubbing it the “pinwheel”. Orders were put in on the spot, guests requested paired color schemes for their own house. I obliged and made a few for sets over the following months.
As a project, this was an absolute blast. I made the set in August so it was a pleasure to craft it in my garage over a few breezy summer days. The construction of the boards were simple and easy for anyone to replicate in their spaces. The painting was much more intensive, and while I loved being able to spend the time on it, many people may not want to spend that time taping off all the little geometric details.
As I made more sets, the process did become more streamlined. The painting always took the longest, but when I had multiple sets to make, I could shift focus on different boards to keep my productivity up. I would like to try out some more illustrative board designs in the future. Possibly including my own illustration and mural painting experience into a set.
Here are some of the other boards sets that have been made by me:


If you liked this project, please leave a comment. I would love to hear about your own projects or talk about my process if you have questions.